How to add a Caption to an Image
All captions should be added to an image (photo, chart, graph, table, etc.) using the PressBooks caption button. ( Figures and tables should be named separately.) Doing this places the caption underneath the image, be it a figure or a table.
Add captions using the Pressbooks caption button as follows:
- Left-click anywhere on image
- Locate and click on the pencil icon in the upper left corner
- Enter description in the Caption field. (See Figures and Tables: labels, numbers and descriptions)
- Add a clear description of the image in the Alternative (Alt) Text field for accessibility purposes
- In general, an image should be no wider than 500 pixels, and the Height should be no bigger than 600 pixels. Use the Custom Size feature to adjust this, if needed.
- Use “Align” to position the image.
- Make sure the “Link to” dropdown list points to “Media File”. Adjust if needed.
- Click on “Update” to save.
Tools to help
There are a couple of browser add-ons that can help you capture the correct information for web-based Creative Commons licensed material. If you work with CC material often, it might be useful to take a look at these tools as browser add-ons to make attributing content easier.
- Open Attribute – a browser plugin for Firefox and Chrome that grabs the CC license metadata on a web page and turns it into an attribution for you
- Commons Machinery – a suite of plugins for Firefox and open office tools that enables copying and pasting images with the attribution info already attached
Figures and Tables: labels, numbers and descriptions
When adding the caption, be sure to use a numbering system that incorporates the chapter number and image sequence to the Figure or Table label.
After numbering the Figure or Table, provide a description of the figure or table. As a general rule, do not use the title given to the image by the artist for your description. There should be no punctuation (period or comma) between the label/number (Figure 4.3) and description (The green discus fish shown in its natural environement).
- Figure with number and label
a) Number format is “Figure” = chapter number + dot + position number
b) Example with number and label: Figure 4.3 (The third image in chapter 4.) See sample below.
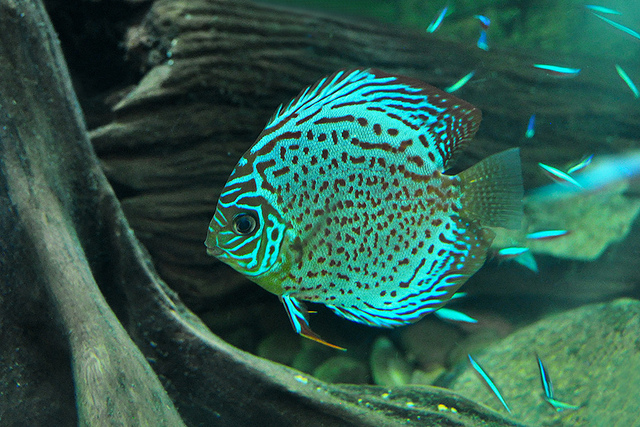
Figure 4.3 The green discus fish shown in its natural environment.
- Table
a) Format is “Table” = chapter number + dot + position number
b) Example: Table 3.1 (The first table in chapter 3.)
Citation vs Attribution
When adding images (photo, chart, graph, table, etc.), the question often arises: When should I cite? and When should I attribute?
The rule-of-thumb is you should use an attribution for photos or drawings. Whereas, a resource that contains words (table, graph, chart) should be cited and only if the words from this resource are used and placed within a newly created structure, i.e. you make a new table, graph or chart.
Cite an image as you would text within the body of your work using the in-text method designated by the citation style chosen for your book.
Place the in-text citation (or citations, if drawn from several sources) at the end of your resource preceded by the words: “Data source:”. See examples below. In these examples, the citations are highlighted in blue.
For a broader discussion on this topic, see Quill West’s presentation (for Pierce College, CC-BY 4.0): Citations vs. Attributions. And how to deal with them in your work.
Table
| Table 2.3 Hotel revenue in British Columbia | |
| Hotel | Annual Revenue ($ millions) |
| Motel ABC | 23.4 |
| Hotel DEF | 54.2 |
| Data source: Johnson, 2013 | |
Graph
| Graph 2.3 Hotel revenue in British Columbia |
| Data source: Johnson, 2013 |
Chart
| Chart 2.3 Hotel revenue in British Columbia |
| Data source: Johnson, 2013 |
Who Gets Attribution for an Image
It is important to understand WHO to give credit to for an image. Frequently, especially for a work in the public domain, it is not the artist or photographer who created the original work. Instead, you must attribute the individual who created the version of the work that you are using in your book or educational resource. In other words, you are giving attribution to, for example, a photograph of an original painting.
Below is a photograph of the famous painting, Mona Lisa, by Leonardo da Vinci. In the attribution statement, credit is given to the photographer, not da Vinci.

Mona Lisa: painting by Leonardo da Vinci; photograph of painting by Dcoetzee.
This image was found on Wikimedia Commons. Below is information about the “author” or photographer.
The attribution statement should say: Mona Lisa by Dcoetzee is in the public domain.
Image Attributions
Citing Government Websites and Publications
If using images from a government publication or website, see Citing Government Websites and Publications for details about attribution.
Placement of attributions
The caption for each image should only contain the figure or table label and number, and description. This keeps the caption clean and uncluttered.
- The attribution for each image should be placed in a list at the end of the chapter, after the References list
- The list is called Attributions or Image Attributions (depending on whether other attribution types are included)
- Heading 2 is used for this label
- The format for each attribution in the list are noted below.
Source of image: source statement
Sometimes it is significant to the textbook subject matter that the source of an image, e.g., a museum collection, be noted as part of the attribution statement. If required and available, a source statement can be included at the end of the attribution statement.
Source statement example: This image is available from the Toronto Public Library under the reference number JRR 1059.
Full attribution statement with source statement: Toronto Rolling Millspublic domain. This image is available from the Toronto Public Library under the reference number JRR 1059.
Attribution statement, standard – open license
Use the attribution layout recommended by Creative Commons.
Format: Image Type Number. ‘Title’ (Source URL, e.g., original flickr page – linked) by ‘Artist’ (profile page of artist URL – linked) is used under ‘license’ (license URL – linked; make sure the version type is included in the statement, e.g., CC-BY 2.0 not just CC-BY)
Example: Figure 4.3 Dallas – Green Discus Fish by Neil Bird is used under a CC-BY 2.0 license.
If you have modified the image in some way, you must indicate this in your attribution statement. See the example below. (Note that if an image includes “ND” (no derivative) as part of the CC license, the image cannot be changed. This includes cropping.)
Example (when image has been modified): Figure 4.3 Dallas – Green Discus Fish by Neil Bird has been modified (cropped) and is used under a CC-BY 2.0 license.
Attribution statement, standard – public domain
Use the attribution layout recommended by Creative Commons.
Format: Image Type Number. ‘Title’ (Source URL, e.g., original flickr page – linked) by ‘Artist’ (Image URL – linked) is in the public domain (link to page describing public domain: http://creativecommons.org/publicdomain/zero/1.0/)
Example: Figure 13.1 Walter Cronkite by NASA/Bill Ingalls is in the public domain.
If you have modified the image in some way, you must indicate this in your attribution statement. See the example below. (Note that if an image includes “ND” (no derivative) as part of the CC license, the image cannot be changed. This includes cropping.)
Example (when image has been modified): Figure 13.1 Walter Cronkite by NASA/Bill Ingalls has been modified (cropped) and is in the public domain.
Attribution statement, standard – no known copyright restrictions
Use the attribution layout recommended by Creative Commons.
Format: Image Type Number. ‘Title’ (Source URL, e.g., original flickr page – linked) by ‘Artist’ (Image URL – linked) is in the public domain (link to page describing “no known copyright restrictions”: https://www.flickr.com/commons/usage/)
Example: Figure 13.1 by Musée McCord Museum has no known copyright restrictions.
Extra steps to take
To ensure that a resource with “no known copyright restrictions” are equivalent to a CC-BY license, do the following before posting an image:
- Go to https://www.flickr.com/commons/usage/
- Scroll down to “Participating Institutions”
- Locate the institution to which the photo is credited and click on the “Rights Statement”
- Ensure that there are no restrictions in the Rights Statement that would not comply with a CC-BY license. For example, if a photo does not allow commercial use, then do not use the image.
Attribution Tools
Attributions for images can be added manually, as described above. However, there are also tools that can help you with this task.
Open Attribute – an add-on
- there is no need to go to another web page and manually enter data into text fields
- it is quick
- it tracks all of the elements required for a complete attribution
- it responds to the correct metadata connected with CC licensed content.
The disadvantages:
- you must install the add-on
- if a webiste does not use CC metadata, this add-on will not work.
OPEN Attribution Builder
This tool was built by the Washington State Board for Community and Technical Colleges and can be found at OPEN Attribution Builder.

It is simple to use and provides descriptions of each field through the “?” icon.
The advantages are:
- no installation required
- licenses and versions can be chosen with dropdown menus
- includes option to attribute work that is a derivative (adaptation)
- provides attribution statement as both plain text and HTML
- if a CC resource is found that doesn’t have the correct metadata, it works well to create a well structured HTML attribution
The disadvantages are:
- must go to a separate website to use
- doesn’t include CC metadata
